You can export and import a project (depending on your role). This function can be used to transfer a project to another installation of Fortes Change Cloud.
Export a Project
Step 1. Navigate to a folder, to the section Projects and select the row of the project to export.
Step 2. Click on Export, a pop up appears:
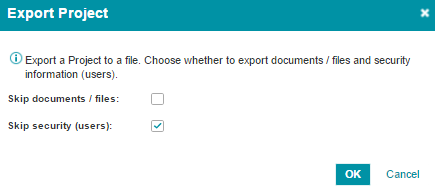
Dialogue export a project
Step 3. Use the check boxes to include documents and users in the export or not, and click OK.
Step 4. Save the export file to your disk.
Import a Project
Step 1. Navigate to a folder, to the section Projects and select the row of the project to import.
Step 2. Click on Import, a pop up appears:
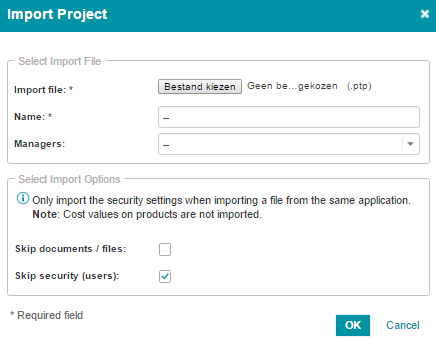
Dialogue import a project
Step 3. Enter the details:
▪Choose file: select the project file to import.
▪Name: enter a name for the project.
▪Managers: select the project manager.
▪Use the check boxes to include documents and users in the import or not.
Step 4. Click OK, the project appears in the folder.