In the tab Planning you can manage the planning of your project. The tab Planning contains three subtabs: Gantt, Costs and Resources. This topic explains how to work with the Gantt. For the other subtabs see Manage the Resources on your project and Manage Costs on your Project
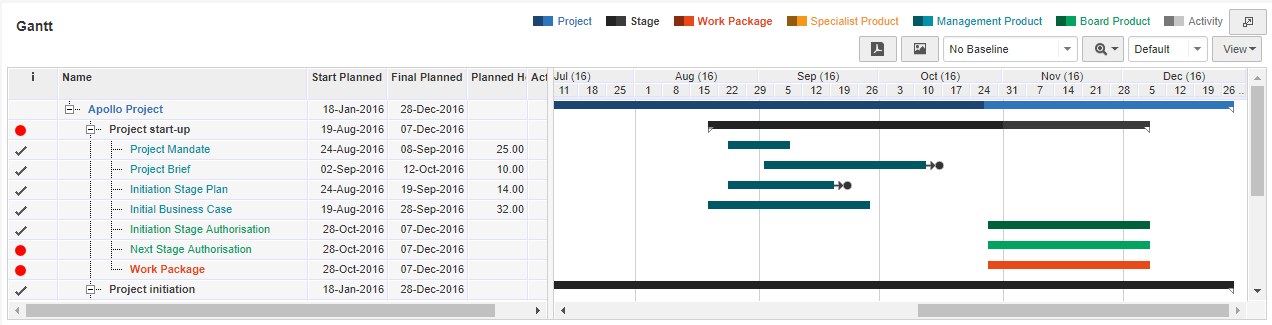
Example of a Gantt chart
Working with the Project Gantt
Step 1. Go to the Planning tab, subtab Gantt and click ![]() to edit the planning.
to edit the planning.
Tip: click ![]() to enlarge the Gantt to full screen.
to enlarge the Gantt to full screen.
Step 2. Click ![]() to add plan-items. Enter a name on the appearing row. Plan-items directly appear in the product breakdown (on the right side of the Gantt).
to add plan-items. Enter a name on the appearing row. Plan-items directly appear in the product breakdown (on the right side of the Gantt).
Step 3. You can move a plan-item by dragging it. The green or blue arrows indicate where it will drop.
Step 4. You can edit the type of a plan-item. Select a row (flag or click it) and click Change Type. Chose from the options and change the plan-item into a product, work package, stage or activity.
Step 5. You can enter and maintain a time planning by:
•adding dates in the columns Start planned and Final planned, or by using the calendar
•using click-and-drag in the Gantt chart.
Step 6. You can add dependencies by clicking a bar and dragging to another bar (see also Working with dependencies on plan-items).
Note: Dependencies to other projects can be entered on the plan-item details page, tab Dependencies.
Step 7. Click Save.
Some extra hints and tips when working with the Gantt:
•Click ![]() to enlarge the Gantt to full screen.
to enlarge the Gantt to full screen.
•Use the column Percentage Completed to enter the progress; the percentage completed is displayed by black bars.
•Click on View, then Columns to select which columns to show, so you can see and/or edit them directly.
•Add Owners to a plan-item: plan-item owners can edit plan-item details on their Homepage and the plan-item details page (e.g the percentage complete).